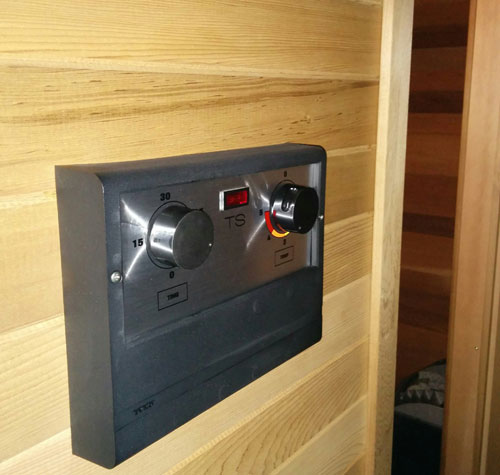
My sauna and the TS-30 are less than 5 years old. I have written extensively about the problems that I had initially with the Tylö heater and the TS-30-01 control panel, but ever since those were resolved it has been working great. However, for the past couple of months I noticed that the timer had slowed and occasionally stopped altogether, keeping the sauna running for much longer than 1 hour (the -1 at the end of TS-30-01 indicates that it has a 1-hour timer).
There are other TS-30 models sold in different geographies, for example the TS-30-12 that has a 12 hour timer (for delaying the start up to 9 hours plus 3 hours of running time).
The problem with this is 2-fold. First, I immediately missed the ticking sound. The sauna timer ticking is one of the most soothing sounds that I know. Second, this can be costly when I forget that the sauna is on and then get distracted by an important phone call or email that pulls me away for a while. It could leave the sauna running for hours. Not to mention that it is dangerous.
It turns out that the timer is a replacement part that is available from the people where I bought the sauna kit. The only problem is – it is not cheap. With shipping I would have been looking at over $100. Luckily there is a 5-year warranty, and while I began to sort out the terms and conditions, I figured I’d attempt a repair myself in the interim.
The timer is a relatively simple electro-mechanical device. It can be described as a 6-pole switch. It is spring-loaded and has an anchor movement, very much like a clock. Several things can contribute to the issue of the timer slowing down and stopping.
- The spring is subject to fatigue and over time there is less torque available to drive the mechanism
- The heat and steam from the sauna can cause corrosion of moving parts
- The spindle that actuates the switches can become harder to turn over time because of dirt and corrosion
Each one of these potential causes can be easily addressed, but we need to get inside.
The process for removing the face place and accessing the timer is the same as for the thermostat (see the link at the beginning of this post). I didn’t know what to expect when I removed the bracket that holds the timer module together, but in the end it was a simple job to clean and lube the moving parts and to increase the spring tension.
Here are the steps:
- Turn off the circuit breaker!
- Remove the two knobs for the timer and temperature control by pulling them off the spindles
- Remove the two screws that hold the black plastic frame
- Remove the plastic frame and the two screws underneath that hold the face plate in place
- Twist the face plate down and remove the two screws that secure the timer behind the face place
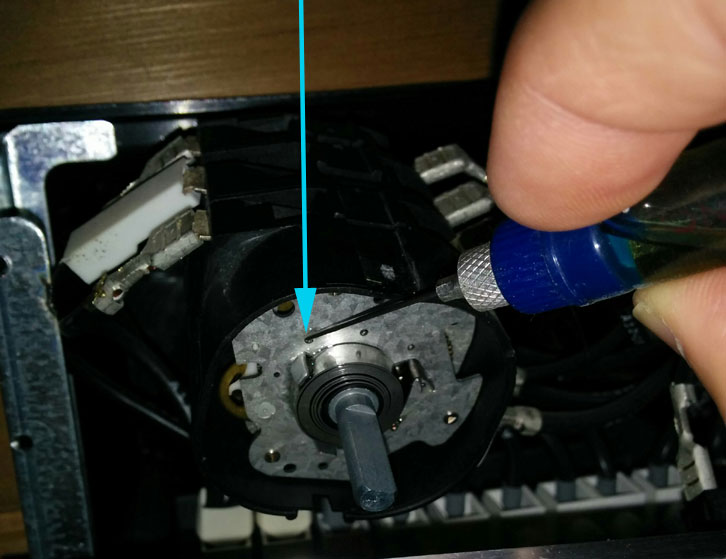
- The metal front plate on the timer has two brackets that hold the unit together. With a small screw driver, push the metal brackets away from the housing on the back of the unit and pull away the front plate and the plastic insert underneath it.
- Now it looks like in the photo above.
- Be careful to not let the 3 segments of the timer unit separate – they are now loose. If they do separate, you will have more work (see below).
- Use a permanent marker to indicate the position of the movement in the black plastic housing.
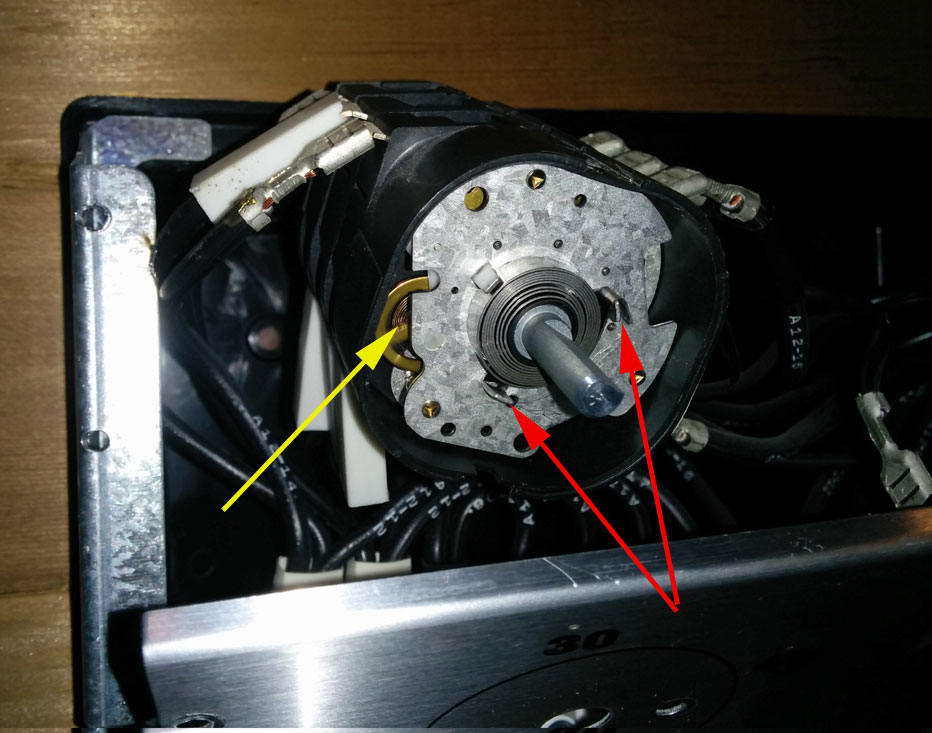
- Pull out the movement from the plastic housing without separating the 3 sections and without allowing the back plate to come off. You may also choose to leave the movement in place, but you will have limited access to the gears that way (yellow arrow in picture above).
- Use a small screw driver to remove the end of the spring from the tab that it is sitting on, wind it counter-clockwise, and place it on the next tab (red arrows in picture above). This will increase the tension.
This could be all that is needed. Secure the timer by replacing the front plate with the brackets. Then put a knob on the timer, wind it, and see if it still stops. This could obviously take some time to test. If everything works, put things back together again in reverse order.
However, if you are like me, you might have messed something up and things do not work or might even be worse. I allowed the rear segment to separate from the rest. I was able to replace the bracket, but when I turned on the power and wound up the timer, a. the pilot light did not turn on, and b. only two heating elements in the sauna received power. At this point I had to disconnect the timer from the wires and remove it from the unit for a closer inspection. I used electric tape and a marker to ensure I would be able to identify where each wire had to go back on, and started to pull the contact shoes off.
Once removed and on the workbench, I saw that each segment has a wheel inside that actuates two contact blades. When I allowed the last segment in the rear to separate from the others, the wheel moved out of its position, and when I attached the brackets, the wheel got squeezed and could no longer turn. I had to use a screw driver and push the contact blades out of the way. Then I re-inserted the wheel and replaced the back cover to hold it in place. Now it was easy to re-attach the front plate with the brackets that hold everything together securely. Once the wires were reconnected, I screwed the timer back onto the face plate and reattached the plastic frame. I turned the power back on and everything worked. I heard a strong ticking sound and the timer shut the oven off at the scheduled time.